> ## Documentation Index
> Fetch the complete documentation index at: https://docs.llmstudio.ai/llms.txt
> Use this file to discover all available pages before exploring further.
# Deploy on Google Kubernetes Engine
Learn how to deploy LLMstudio as a containerized application on Google Kubernetes Engine and make calls from a local repository.
## Prerequisites
To follow this guide you need to have the following set-up:
* A **project** on google cloud platform.
* **Kubernetes Engine** API enabled on your project.
* **Kubernetes Engine Admin** role for the user performing the guide.
## Deploy LLMstudio
This example demonstrates a public deployment. For a private service accessible only within your enterprise infrastructure, deploy it within your own Virtual Private Cloud (VPC).
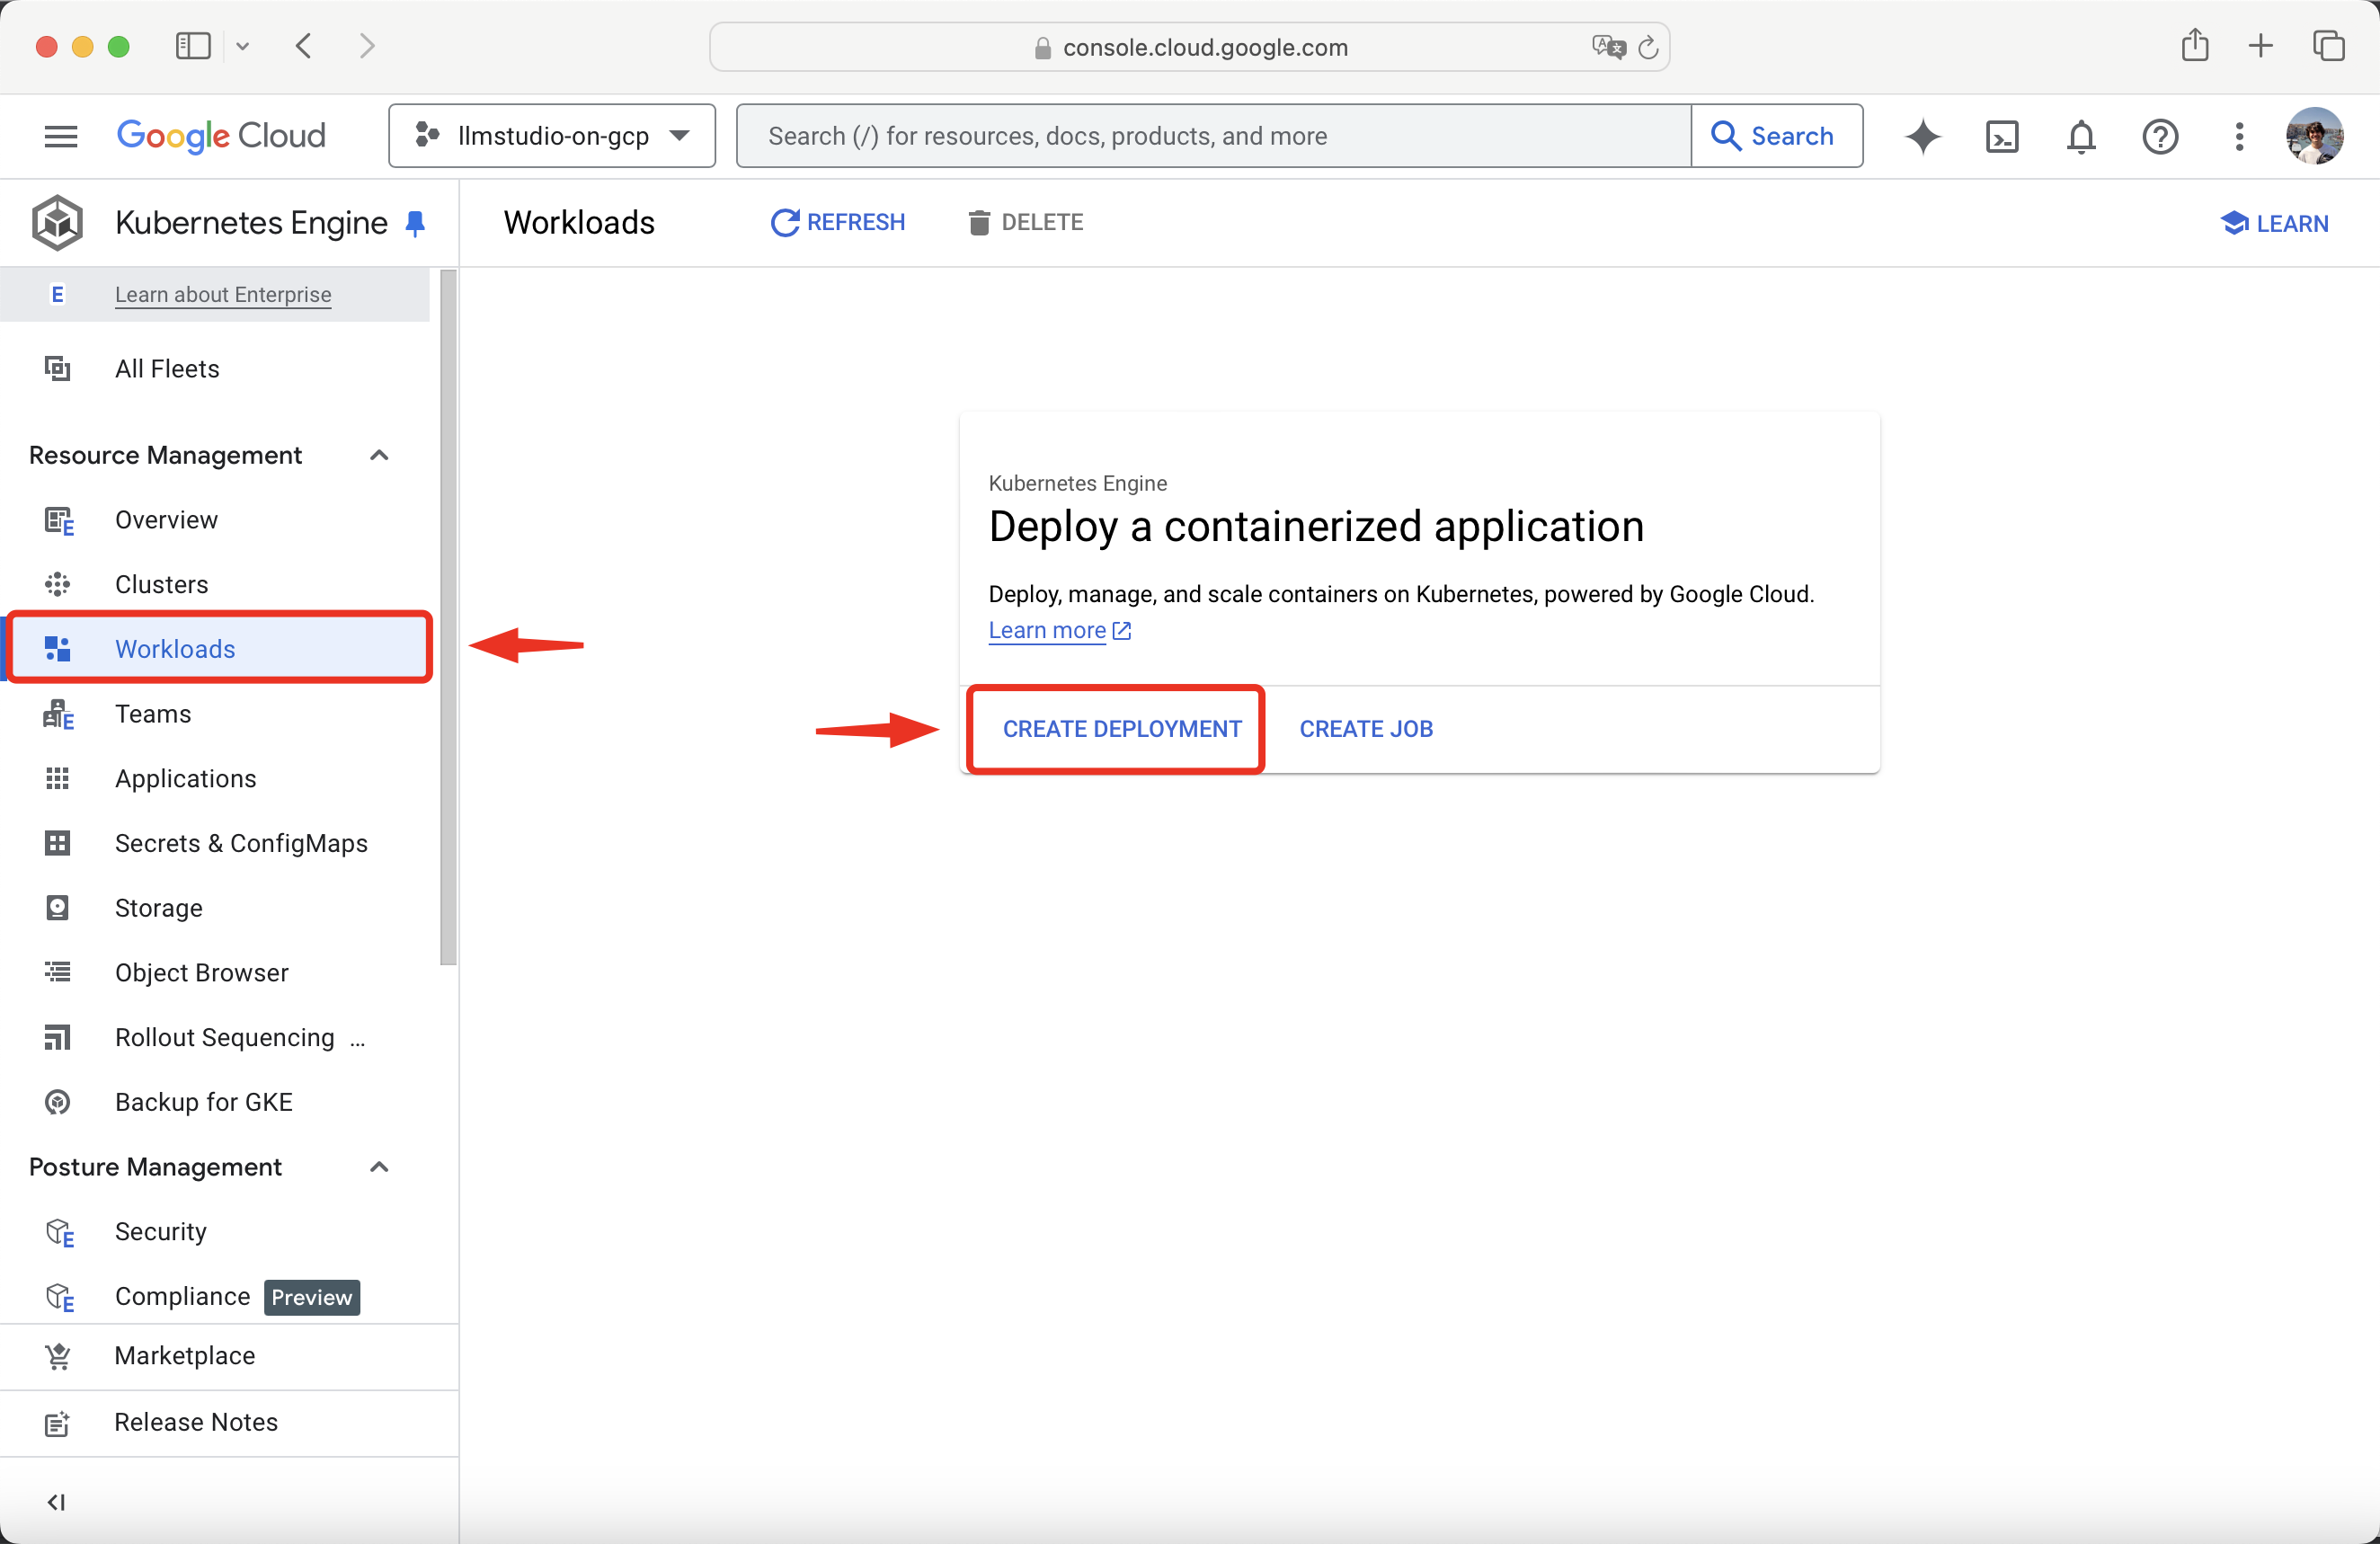
Begin by navigating to the Kubernetes Engine page.
Go to **Workloads** and **Create a new Deployment**.
 Rename your project. We will call the one in this guide **llmstudio-on-gcp**.
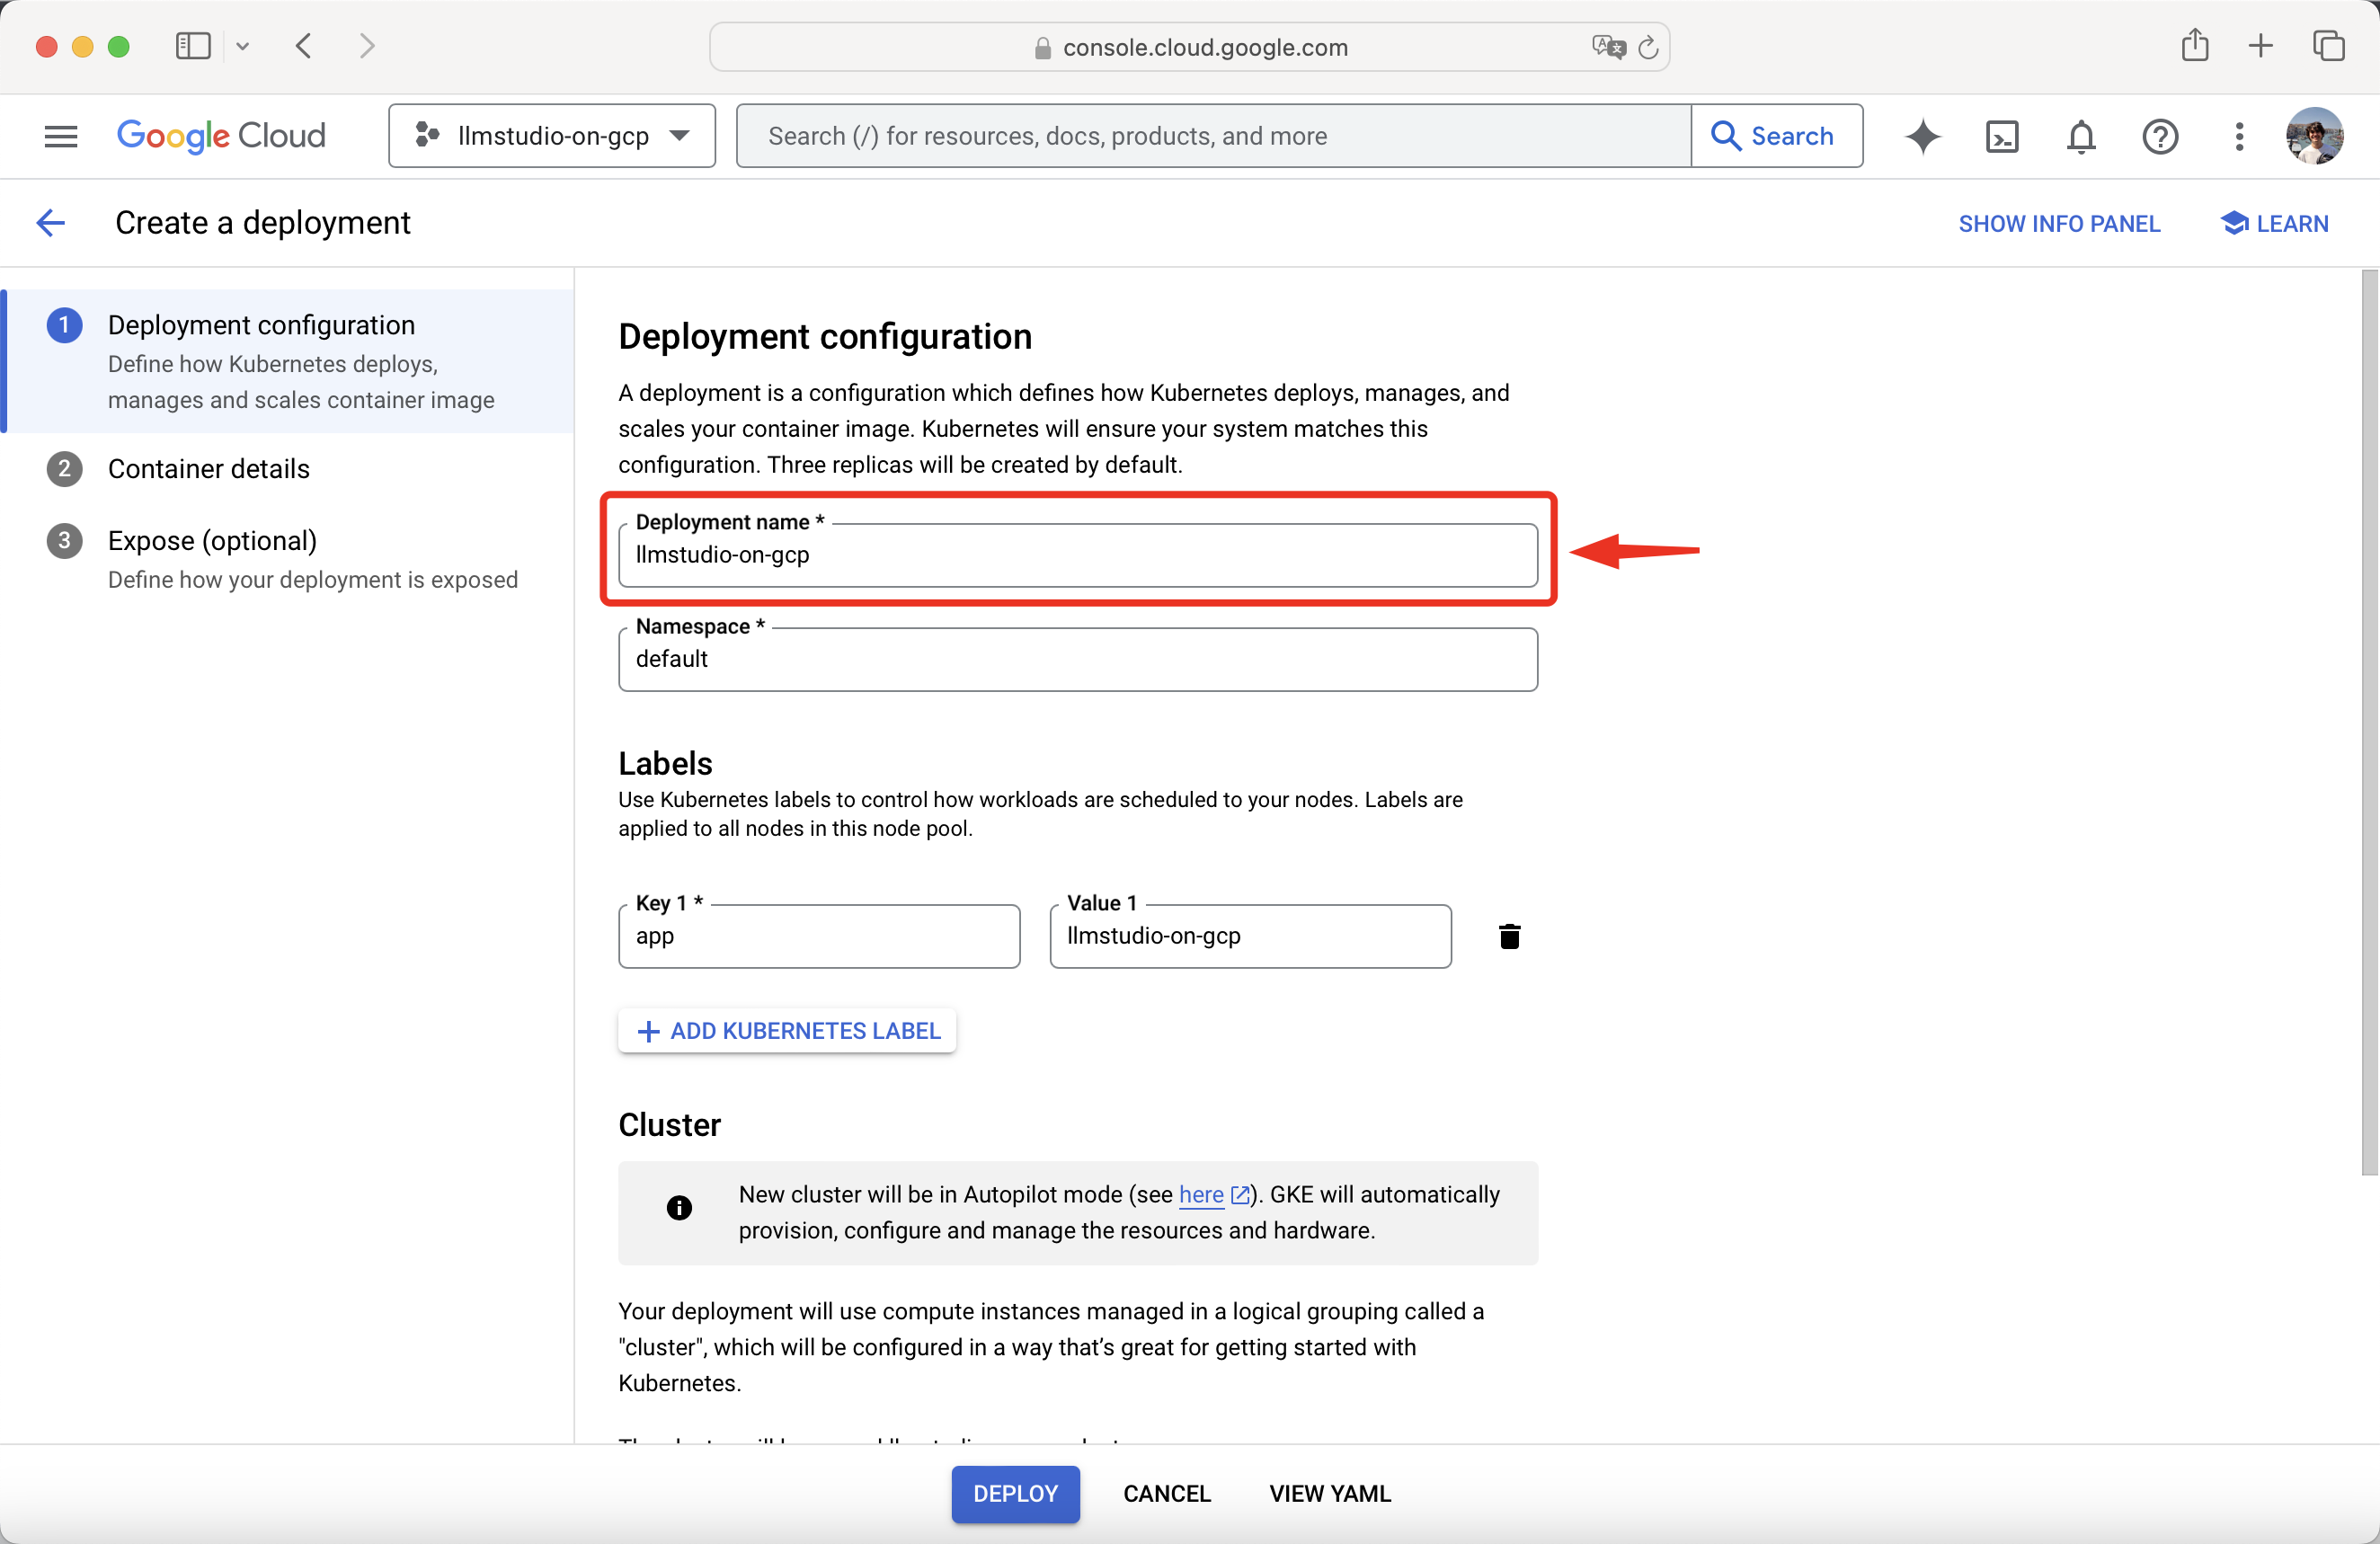 Choose between **creating a new cluster** or **using an existing cluster**.
For this guide, we will create a new cluster and use the default region.
Choose between **creating a new cluster** or **using an existing cluster**.
For this guide, we will create a new cluster and use the default region.
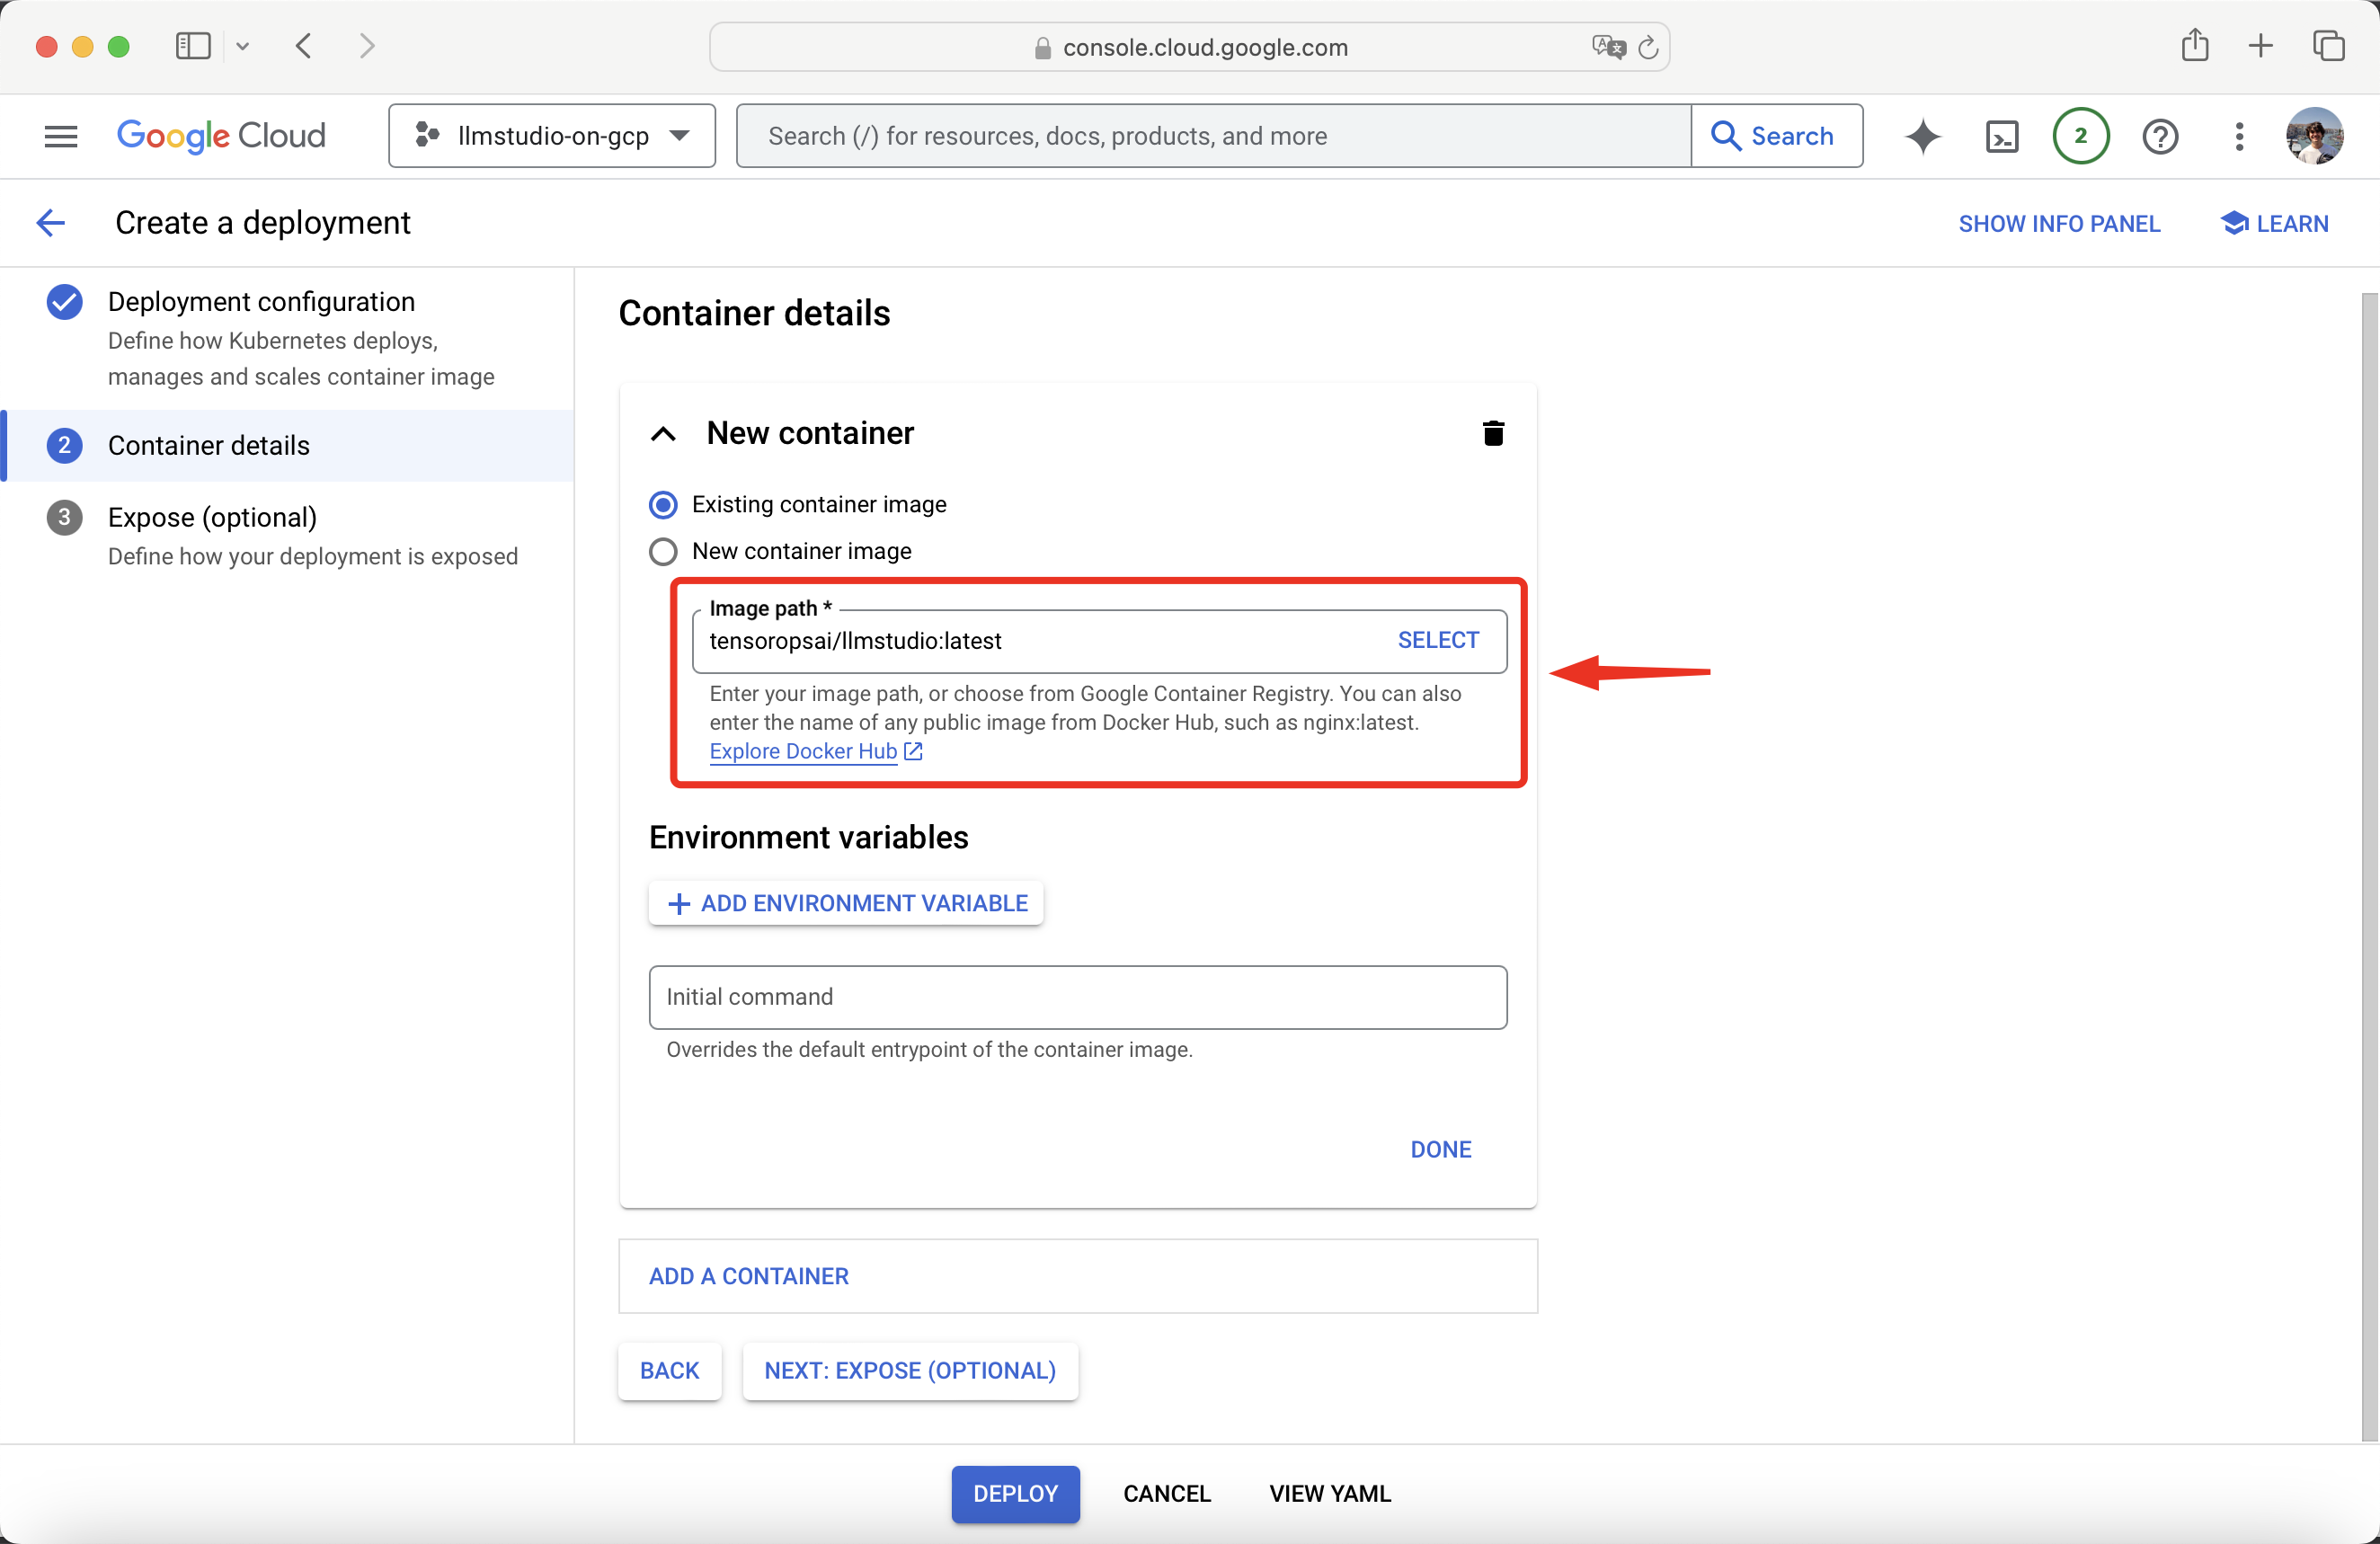
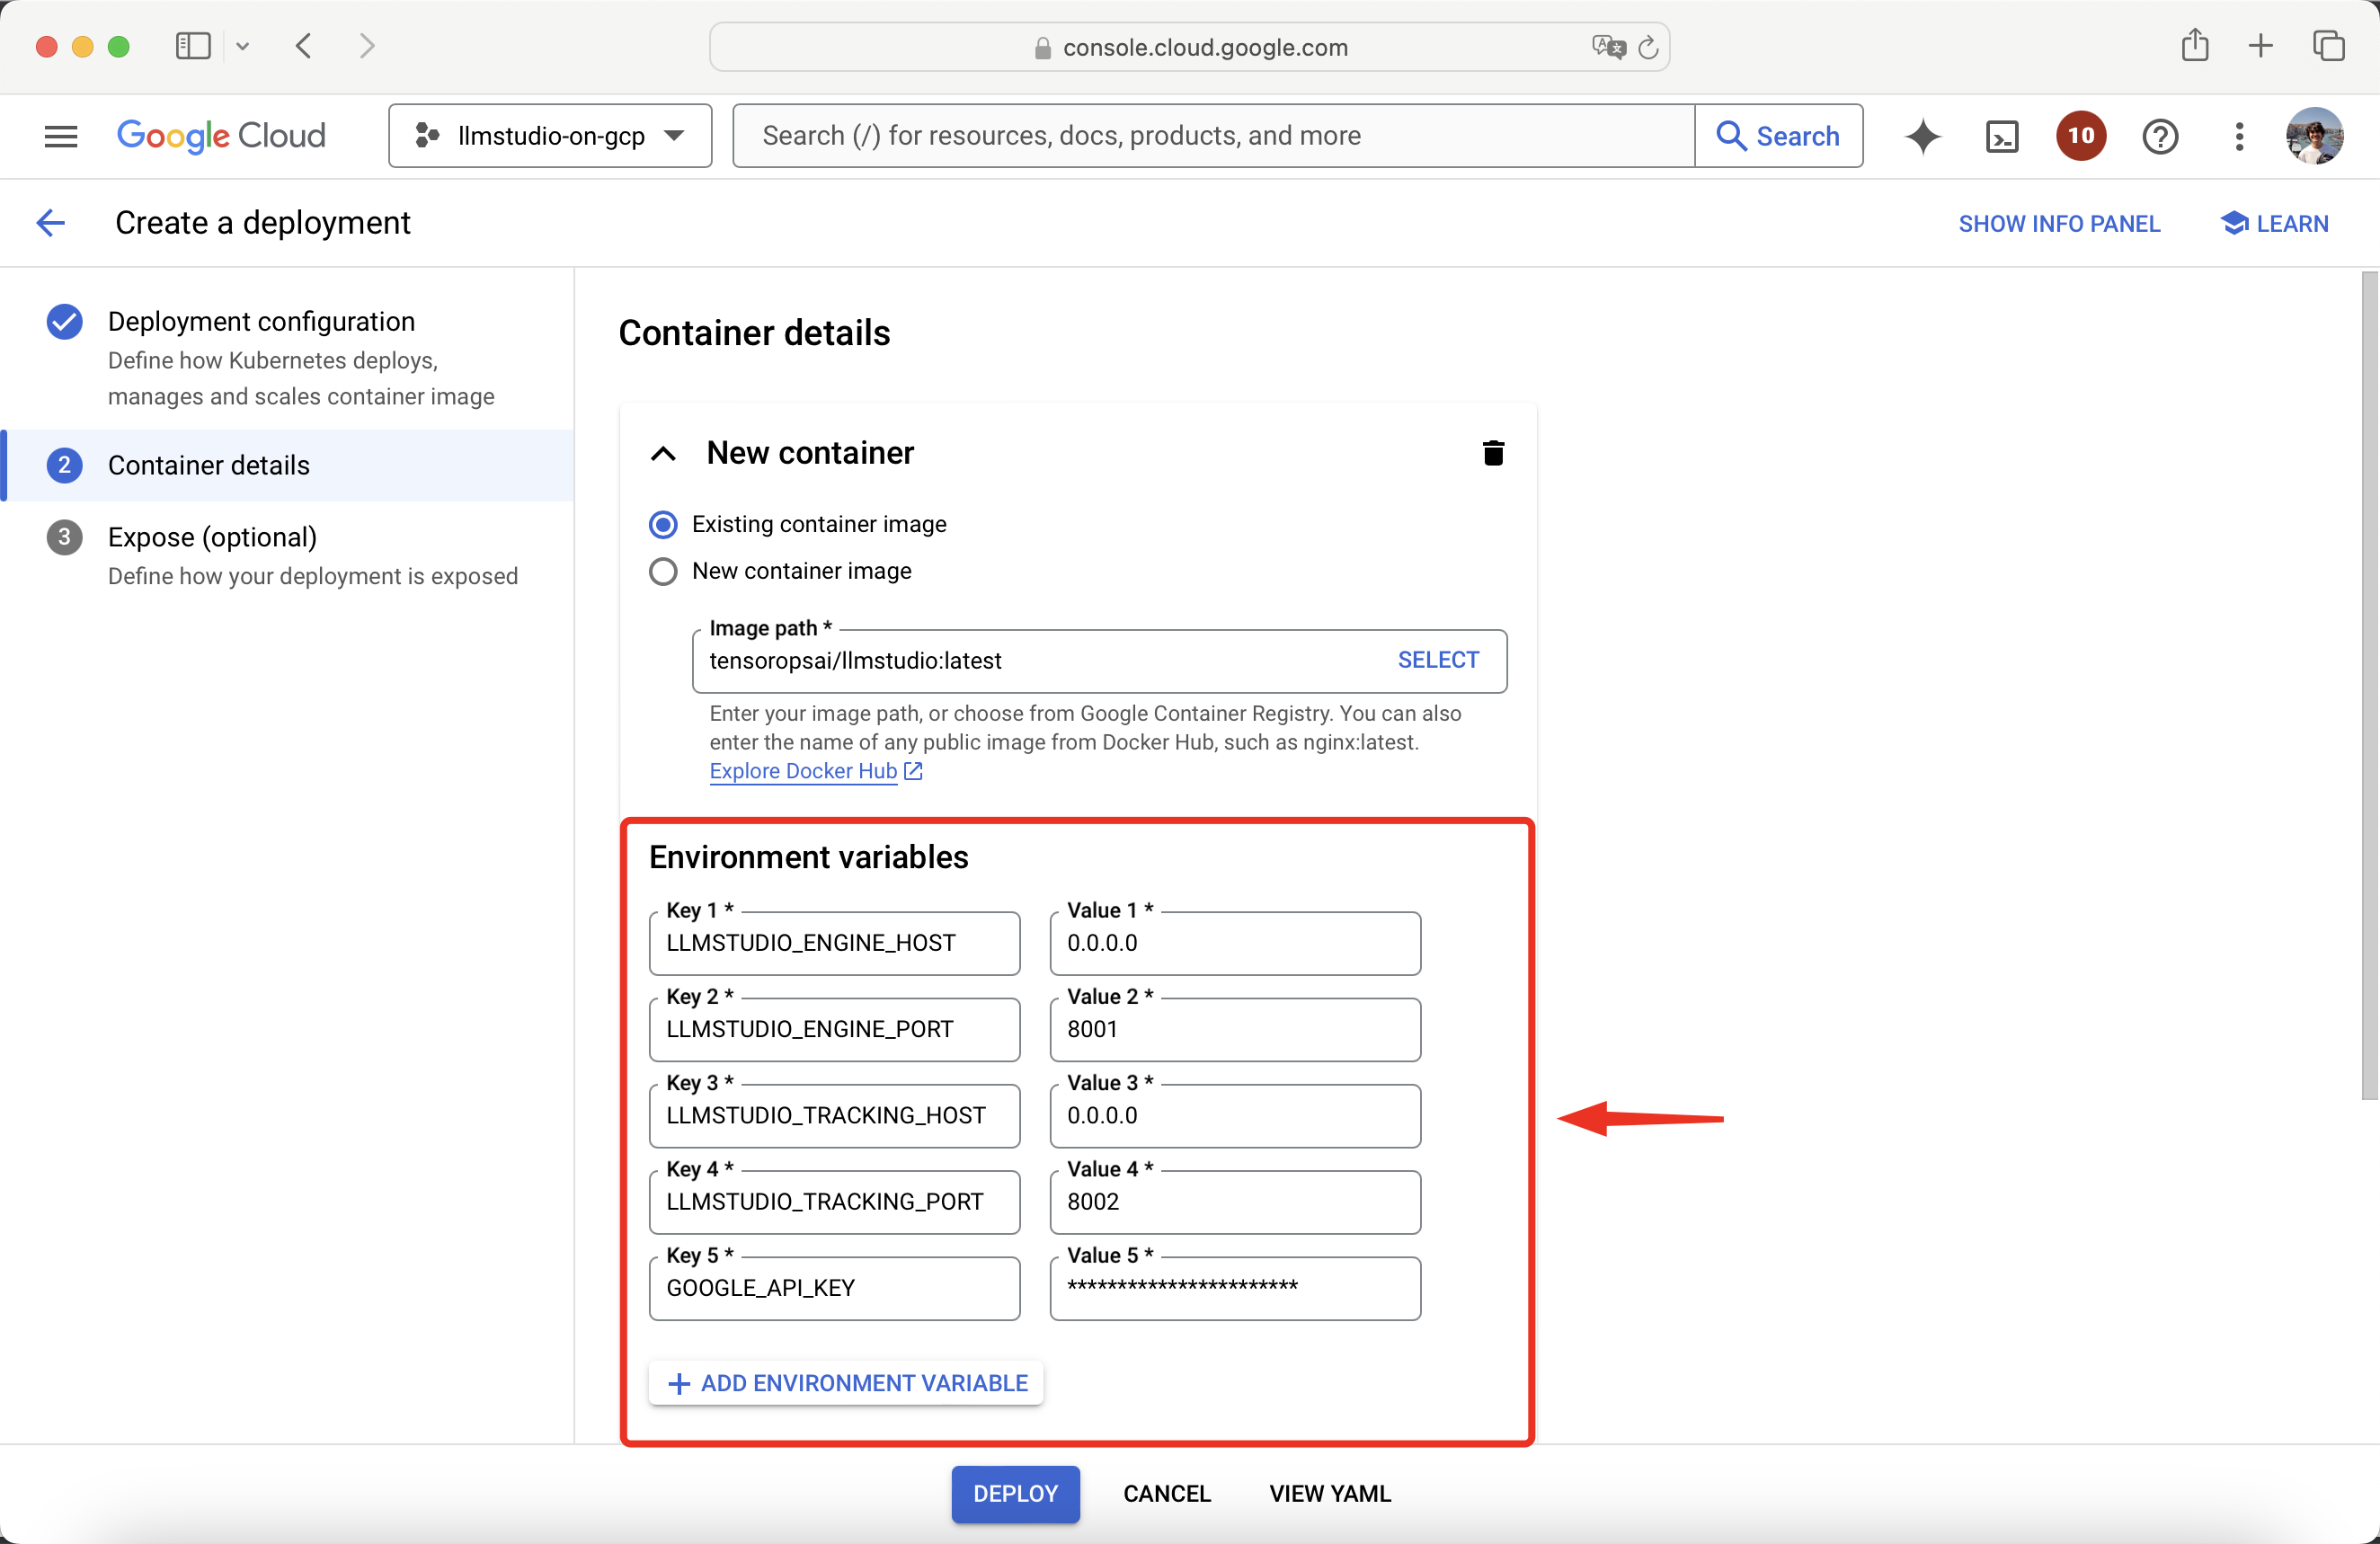
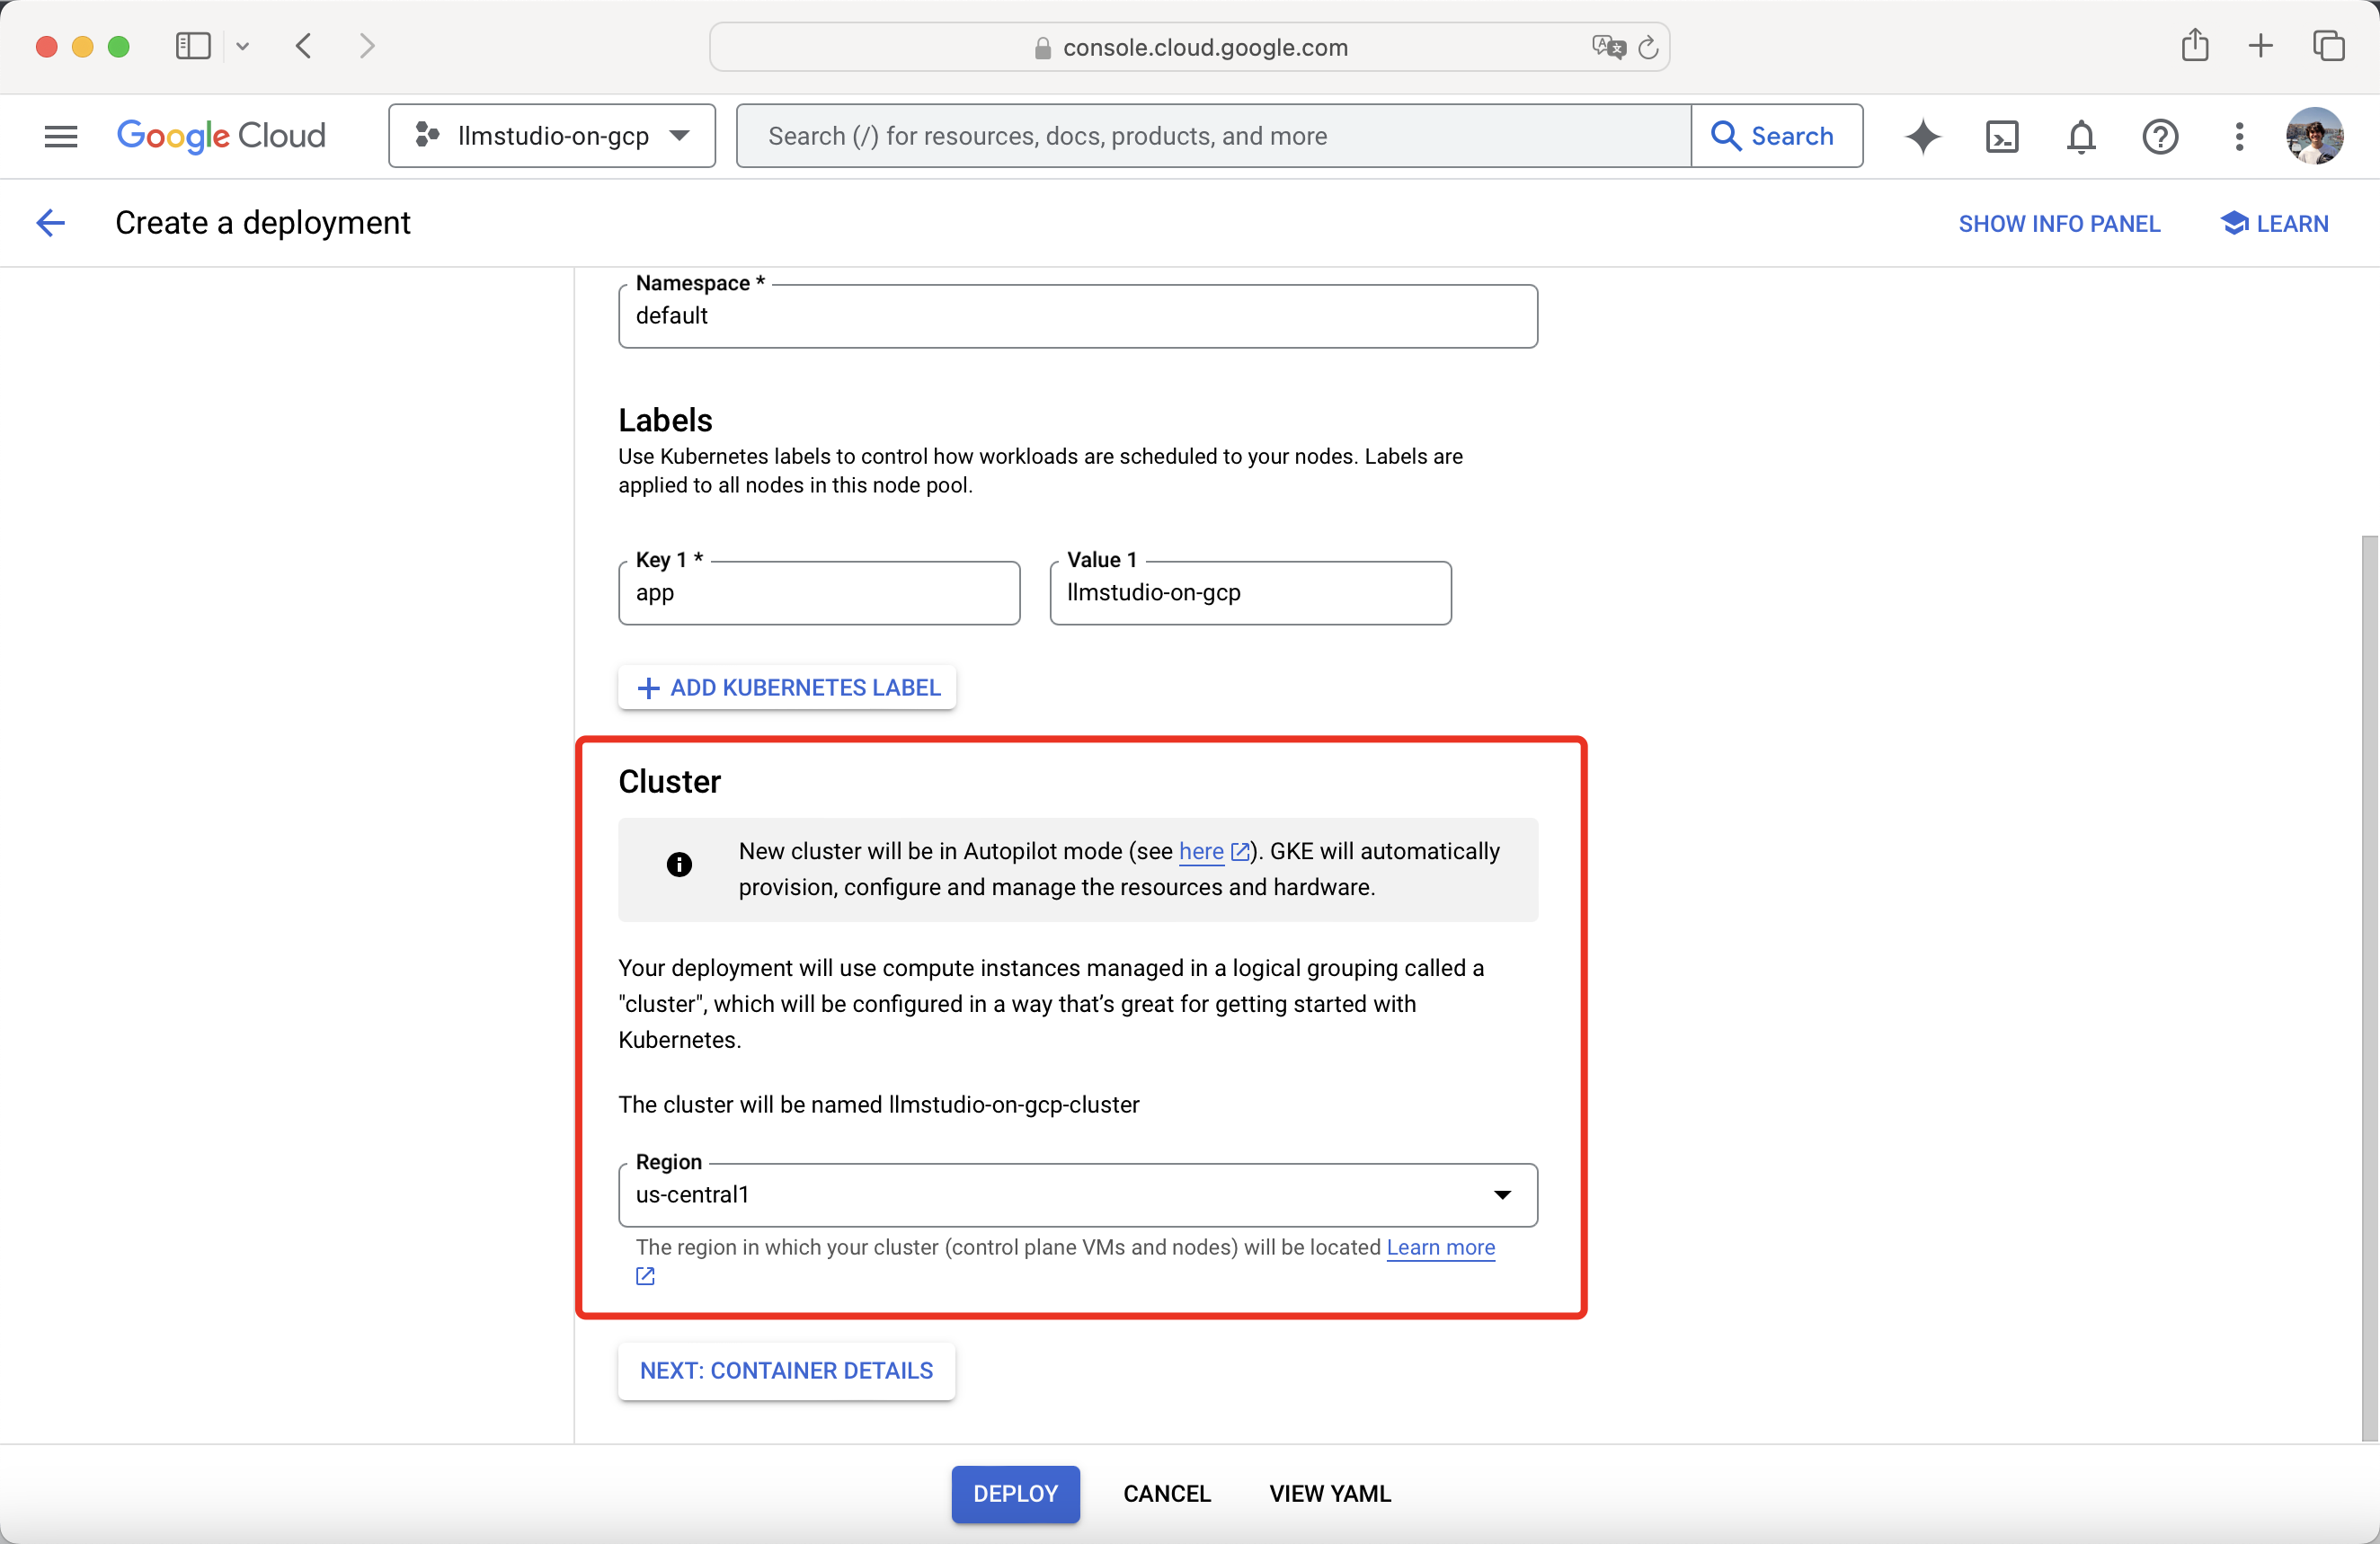 Once done done with the **Deployment configuration**, proceed to **Container details**.
In the new container section, select **Existing container image**.
Copy the path to LLMstudio's image available on Docker Hub.
```bash Image Path theme={null}
tensoropsai/llmstudio:latest
```
Set it as the **Image path** to your container.
Once done done with the **Deployment configuration**, proceed to **Container details**.
In the new container section, select **Existing container image**.
Copy the path to LLMstudio's image available on Docker Hub.
```bash Image Path theme={null}
tensoropsai/llmstudio:latest
```
Set it as the **Image path** to your container.
 Configure the following mandatory environment variables:
| Environment Variable | Value |
| ------------------------- | ------- |
| `LLMSTUDIO_ENGINE_HOST` | 0.0.0.0 |
| `LLMSTUDIO_ENGINE_PORT` | 8001 |
| `LLMSTUDIO_TRACKING_HOST` | 0.0.0.0 |
| `LLMSTUDIO_TRACKING_PORT` | 8002 |
Additionally, set the `GOOGLE_API_KEY` environment variable to enable calls to Google's Gemini models.
Refer to **SDK/LLM/Providers** for instructions on setting up other providers.
Configure the following mandatory environment variables:
| Environment Variable | Value |
| ------------------------- | ------- |
| `LLMSTUDIO_ENGINE_HOST` | 0.0.0.0 |
| `LLMSTUDIO_ENGINE_PORT` | 8001 |
| `LLMSTUDIO_TRACKING_HOST` | 0.0.0.0 |
| `LLMSTUDIO_TRACKING_PORT` | 8002 |
Additionally, set the `GOOGLE_API_KEY` environment variable to enable calls to Google's Gemini models.
Refer to **SDK/LLM/Providers** for instructions on setting up other providers.
 After configuring your container, proceed to **Expose (Optional)**.
Select **Expose deployment as a new service** and leave the first item as is.
After configuring your container, proceed to **Expose (Optional)**.
Select **Expose deployment as a new service** and leave the first item as is.
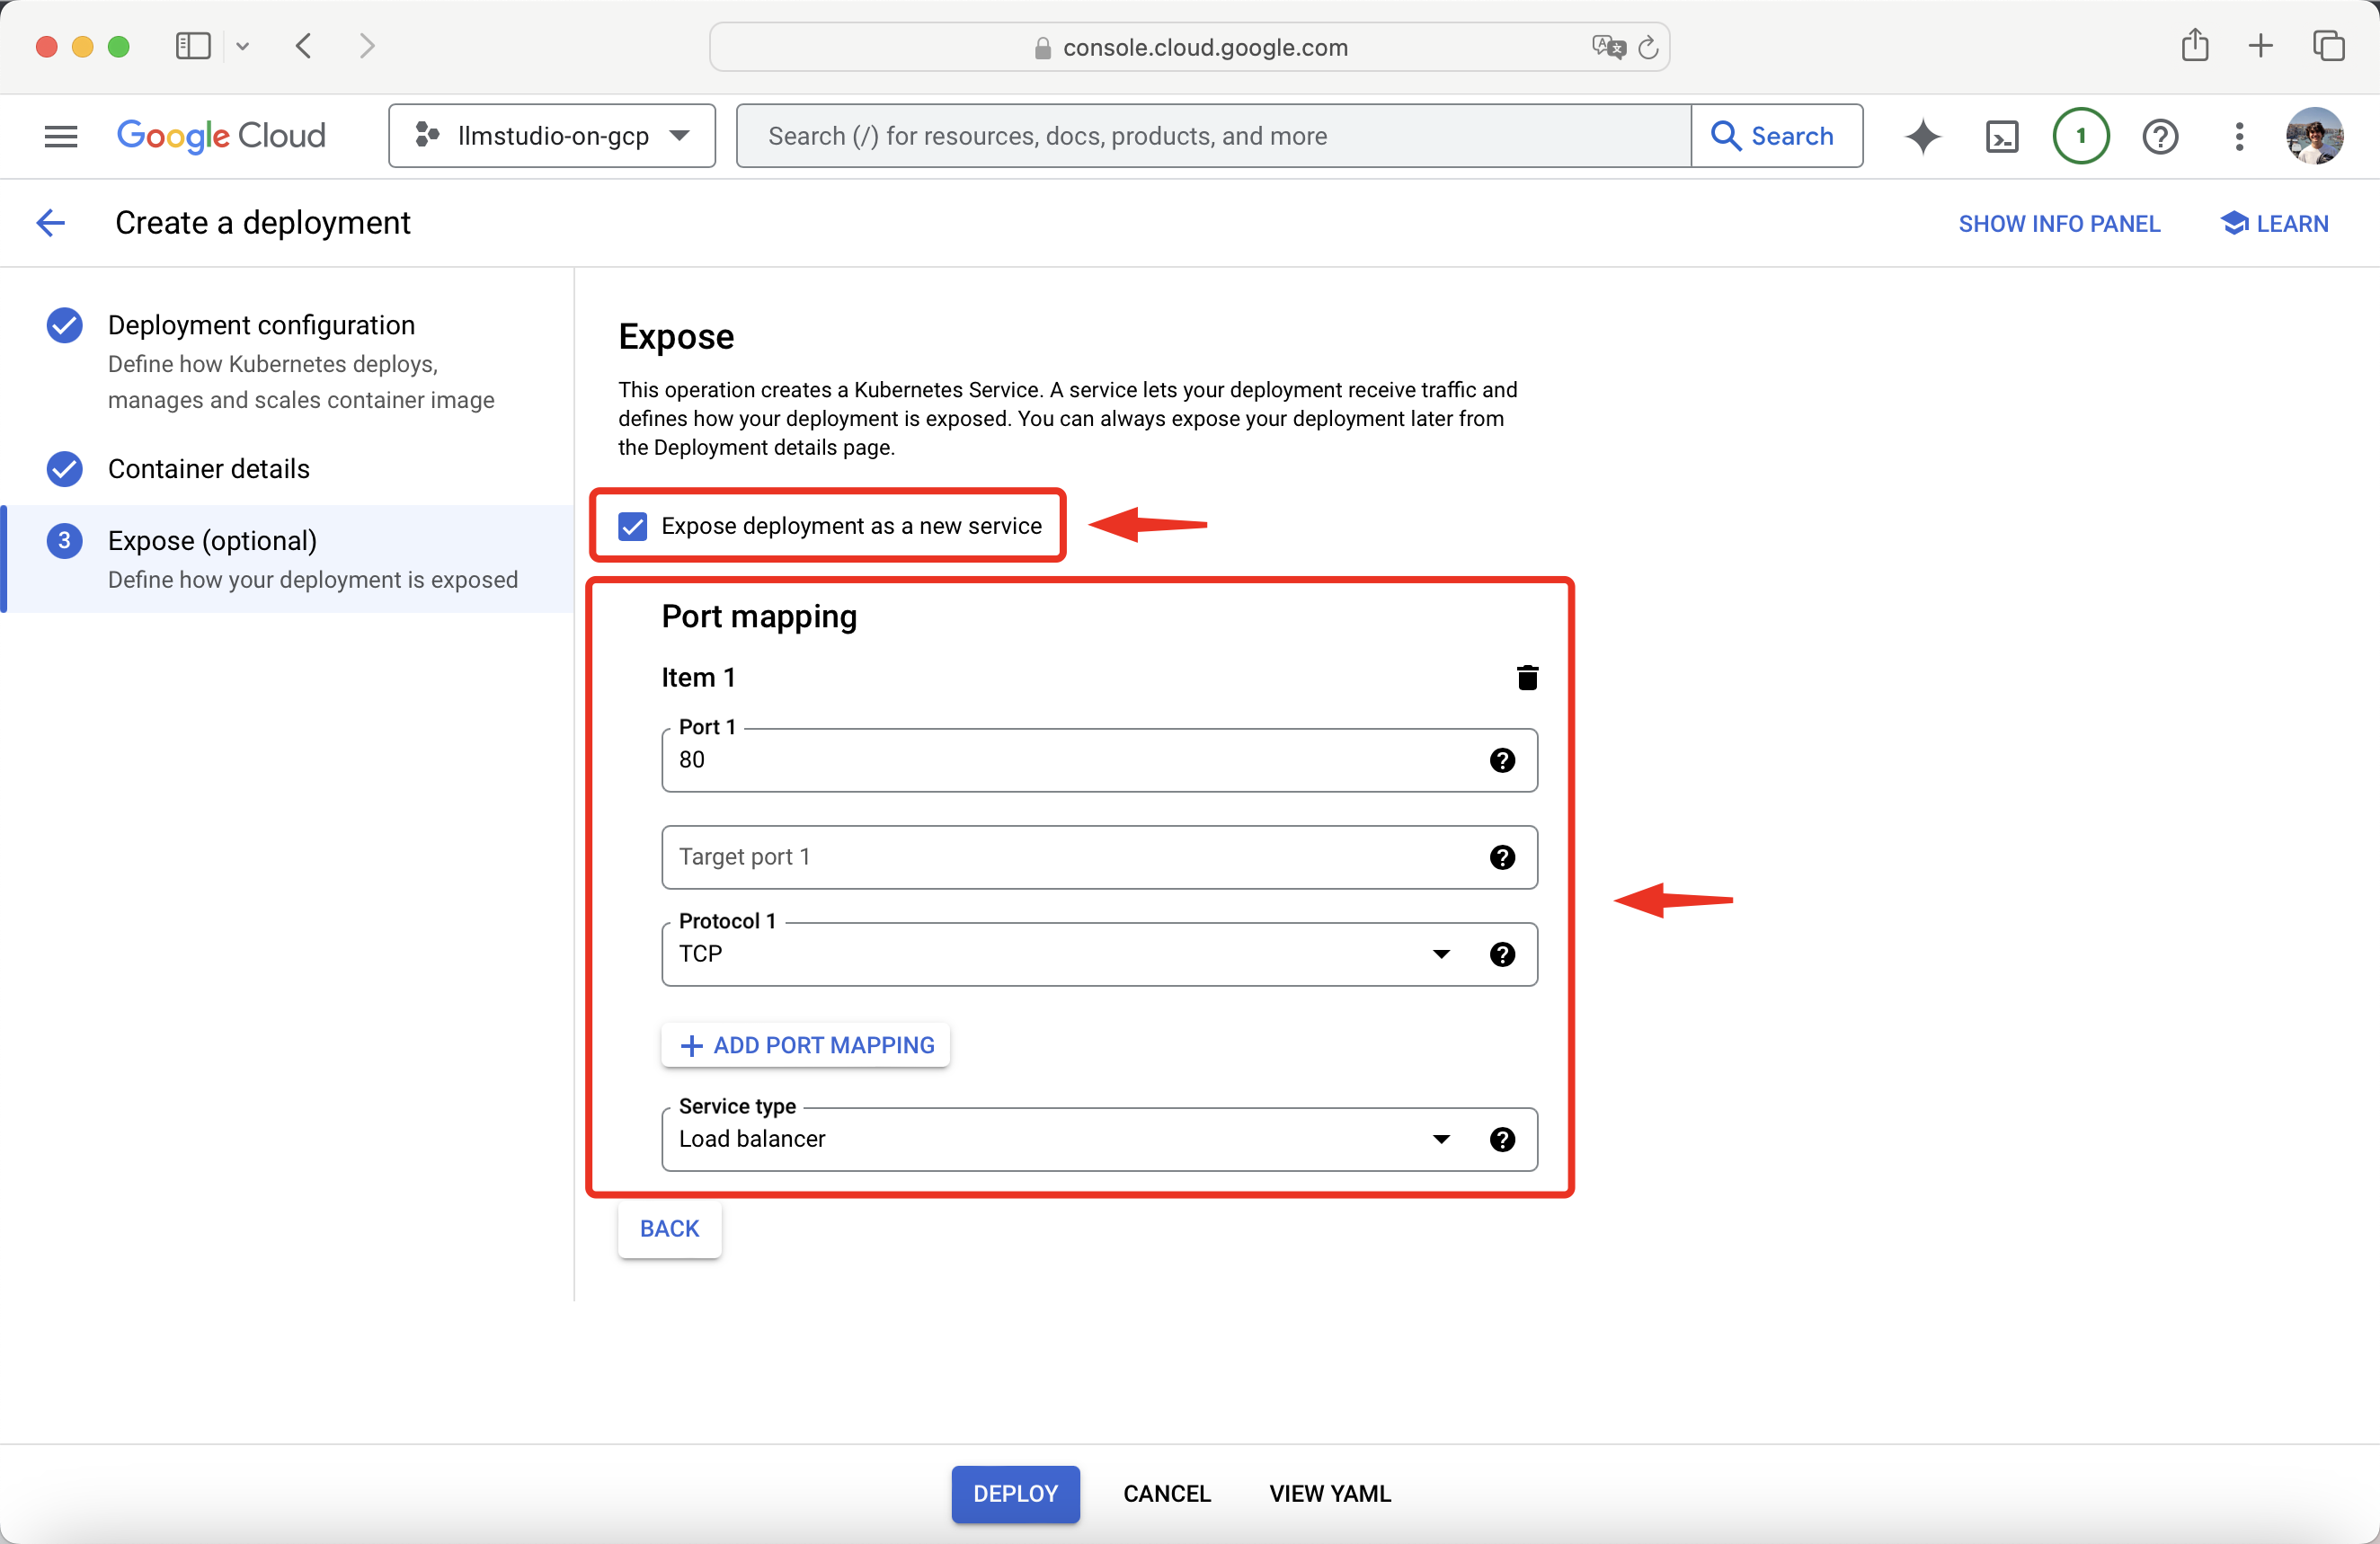 Add two other items, and expose the ports defined in the **Set Environment Variables** step.
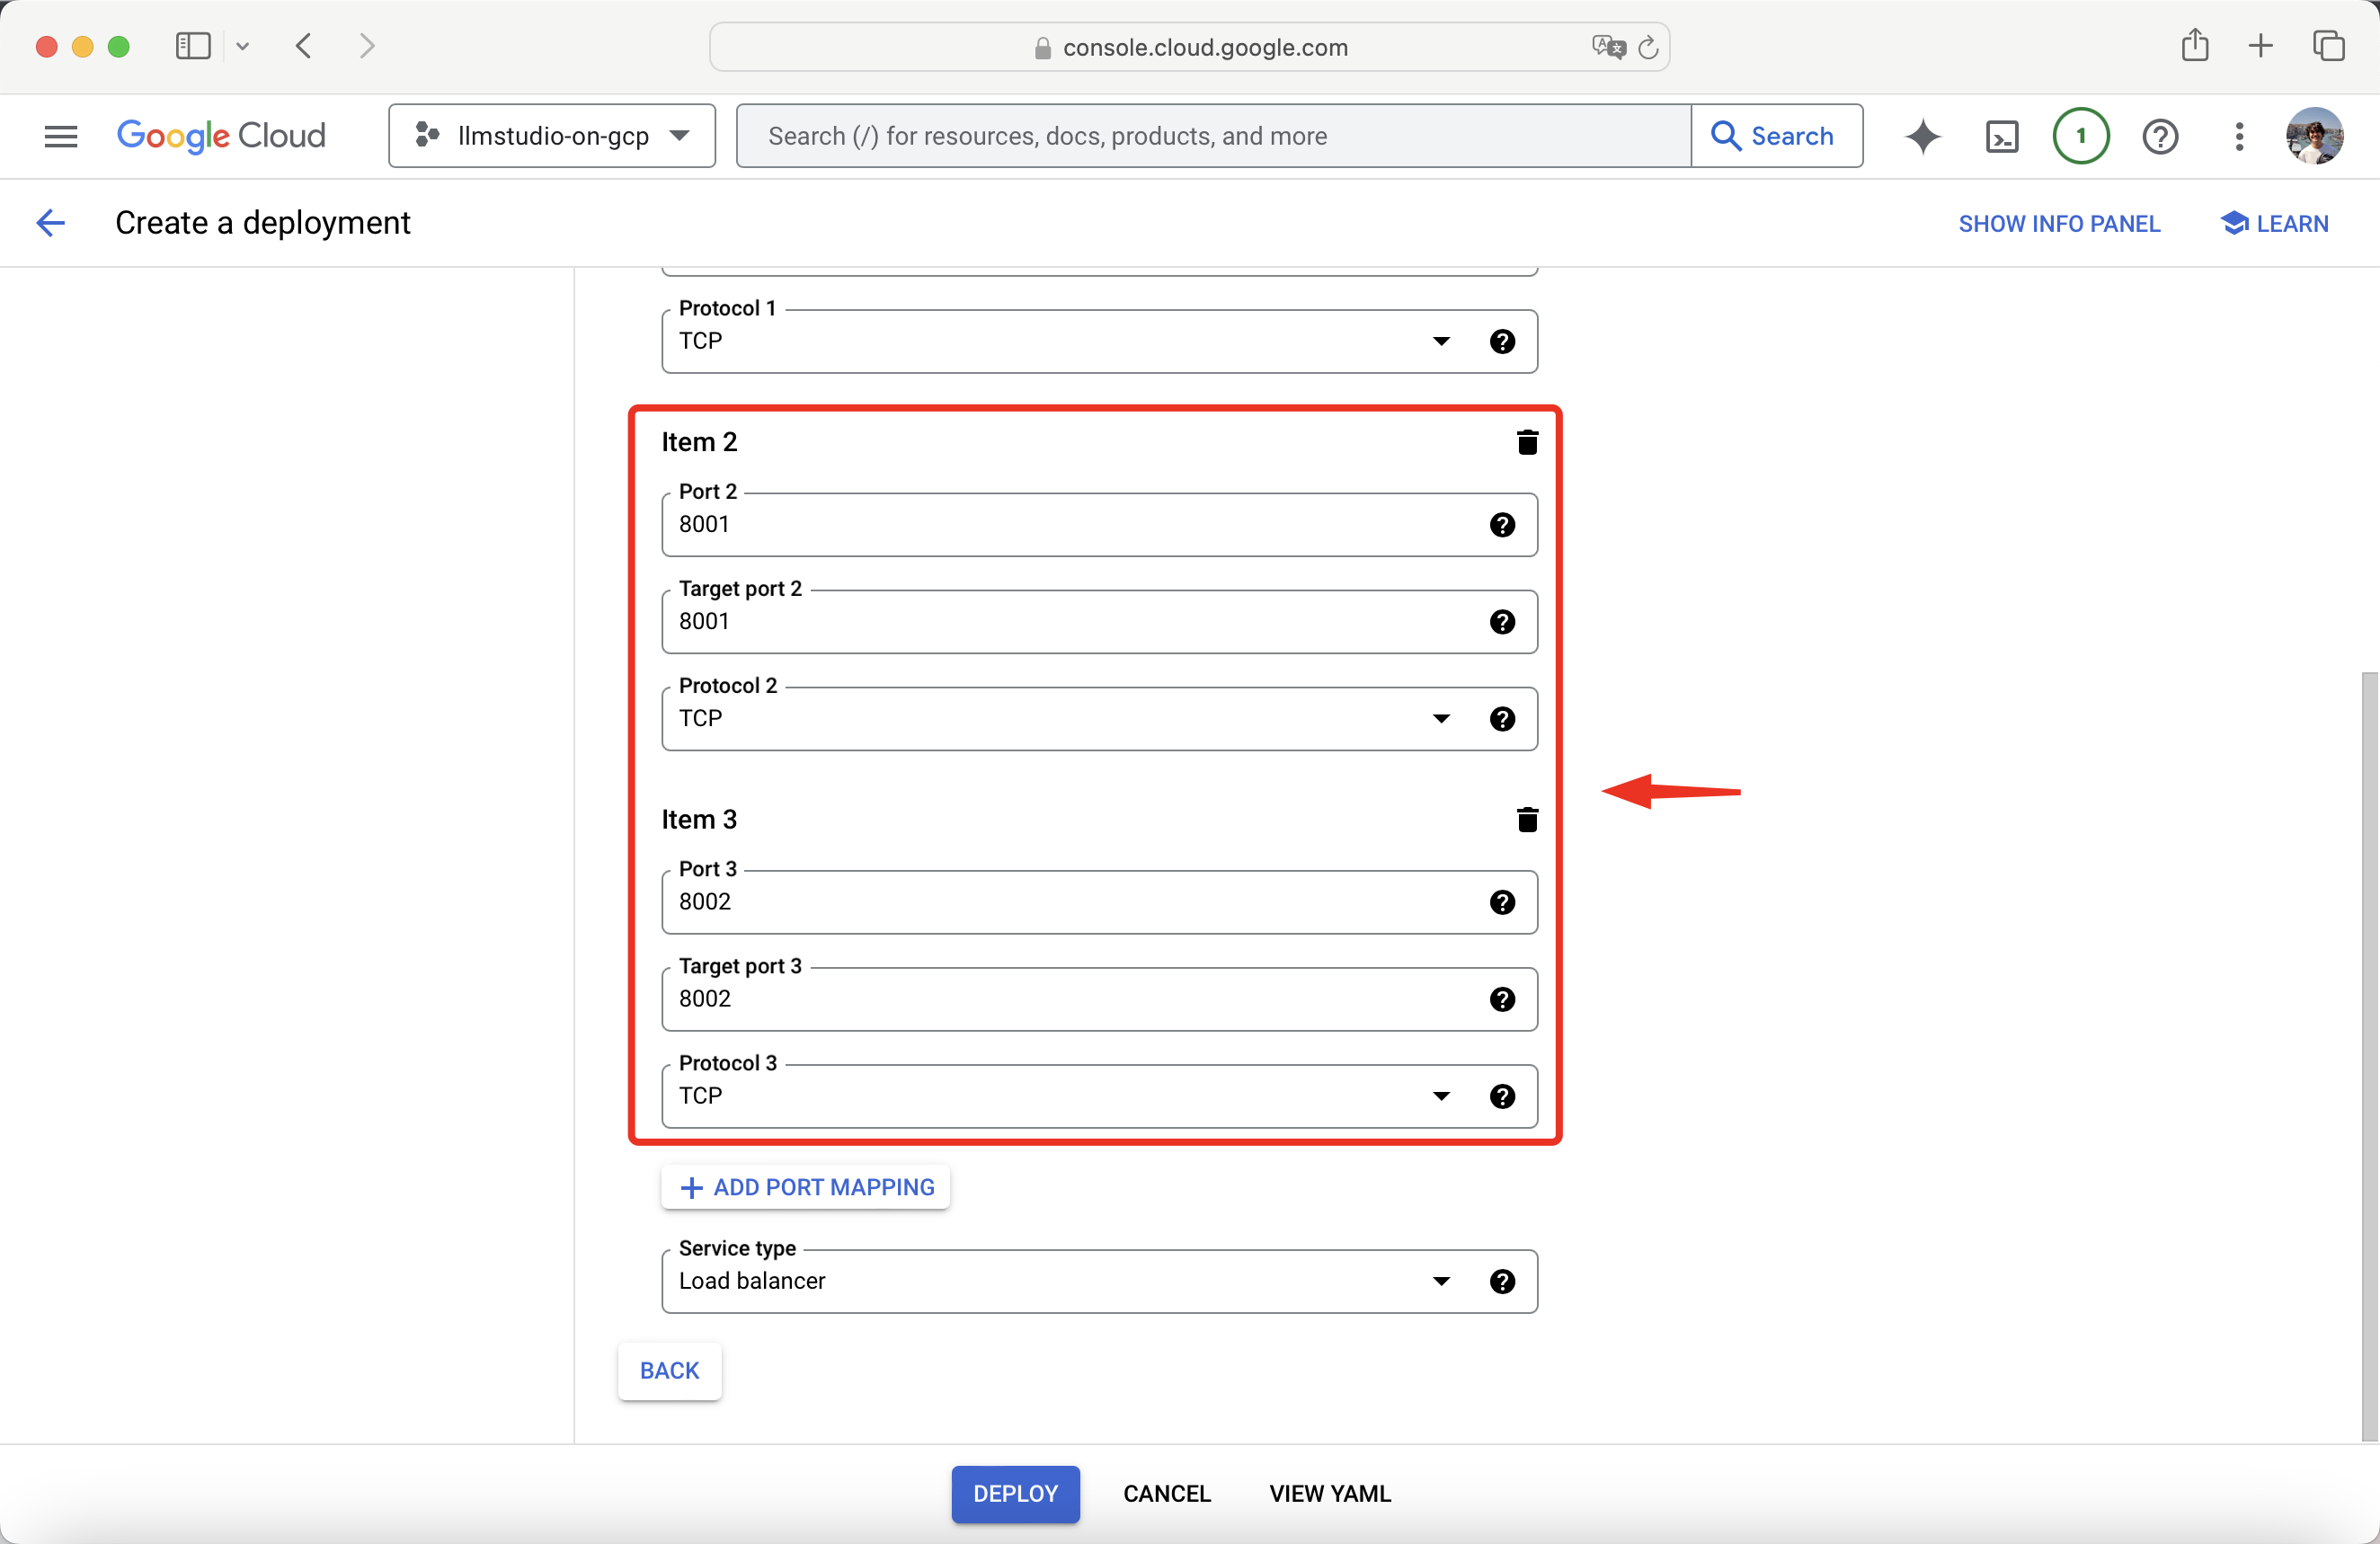 After setting up and exposing the ports, press **Deploy**.
You have successfully deployed **LLMstudio on Google Cloud Platform**!
## Make a Call
Now let's make a call to our LLMstudio instance on GCP!
Setup a simple project with this two files:
1. `calls.ipynb`
2. `.env`
Go to your newly deployed **Workload**, scroll to the **Exposing services** section, and take note of the Host of your endpoint.
After setting up and exposing the ports, press **Deploy**.
You have successfully deployed **LLMstudio on Google Cloud Platform**!
## Make a Call
Now let's make a call to our LLMstudio instance on GCP!
Setup a simple project with this two files:
1. `calls.ipynb`
2. `.env`
Go to your newly deployed **Workload**, scroll to the **Exposing services** section, and take note of the Host of your endpoint.
 Create your `.env` file with the following:
```env .env theme={null}
LLMSTUDIO_ENGINE_HOST = "YOUR_HOST"
LLMSTUDIO_ENGINE_PORT = "8001"
LLMSTUDIO_TRACKING_HOST = "YOUR_HOST"
LLMSTUDIO_TRACKING_PORT = "8002"
```
You are done seting up you **.env** file!
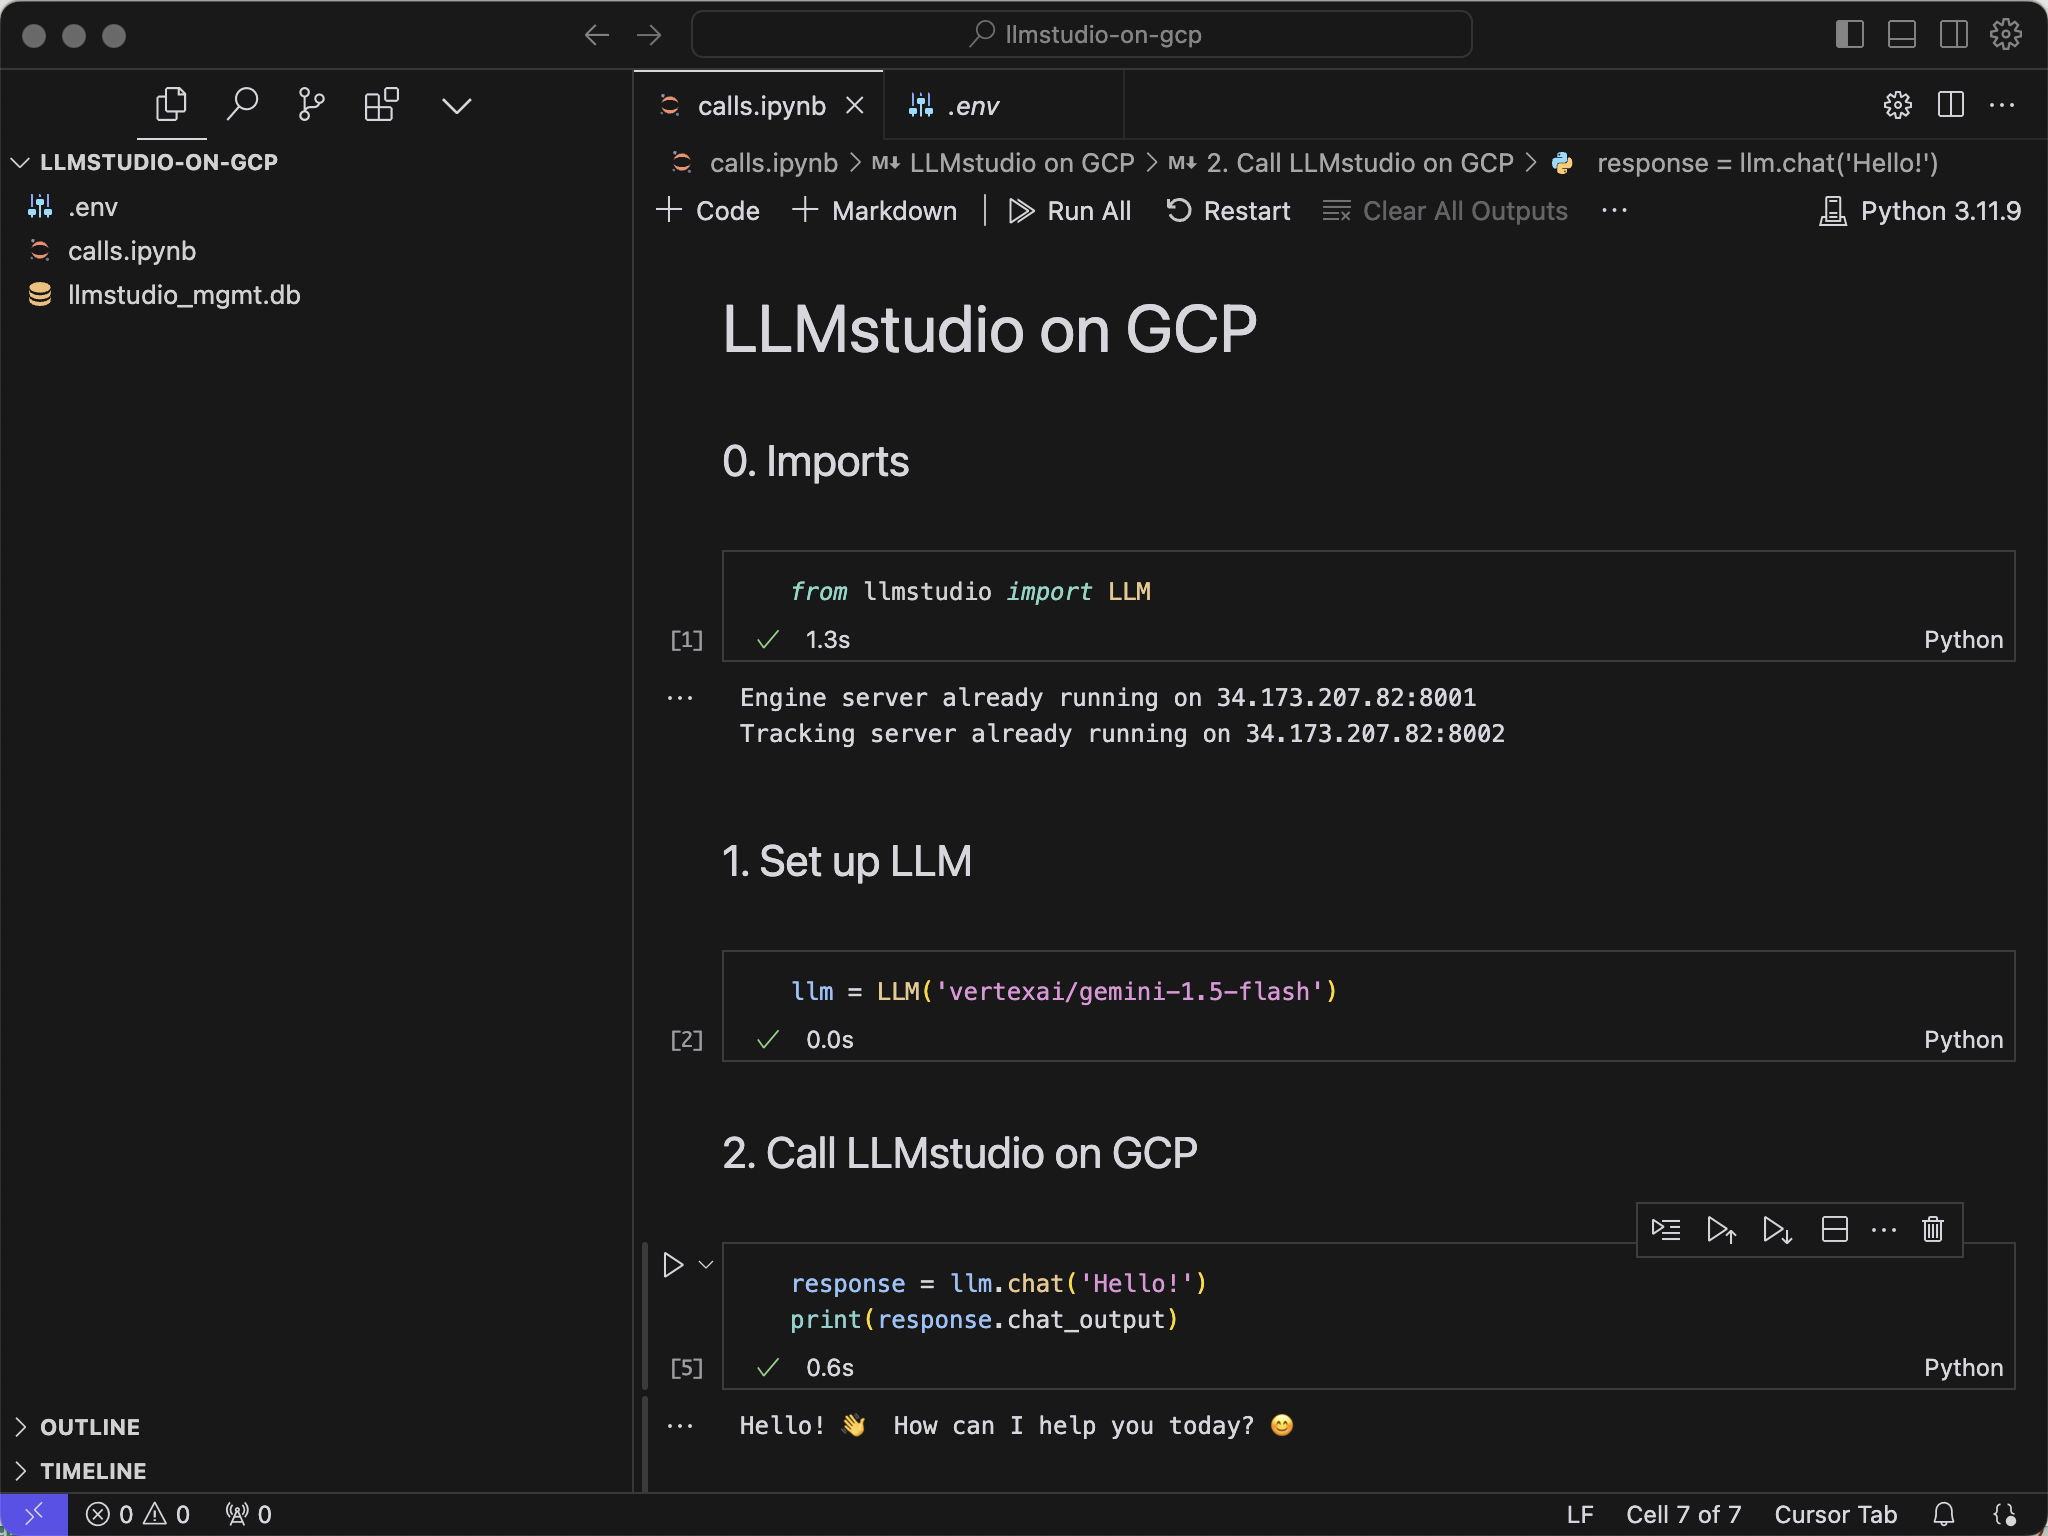
Start by importing llmstudio:
```python 1st cell theme={null}
from llmstudio import LLM
```
Set up your LLM. We will be using `gemini-1.5-flash` for this guide.
```python 2nd cell theme={null}
llm = LLM('vertexai/gemini-1.5-flash')
```
Chat with your model.
```python 3rd cell theme={null}
llm.chat('Hello!')
print(response.chat_output)
```
Create your `.env` file with the following:
```env .env theme={null}
LLMSTUDIO_ENGINE_HOST = "YOUR_HOST"
LLMSTUDIO_ENGINE_PORT = "8001"
LLMSTUDIO_TRACKING_HOST = "YOUR_HOST"
LLMSTUDIO_TRACKING_PORT = "8002"
```
You are done seting up you **.env** file!
Start by importing llmstudio:
```python 1st cell theme={null}
from llmstudio import LLM
```
Set up your LLM. We will be using `gemini-1.5-flash` for this guide.
```python 2nd cell theme={null}
llm = LLM('vertexai/gemini-1.5-flash')
```
Chat with your model.
```python 3rd cell theme={null}
llm.chat('Hello!')
print(response.chat_output)
```
 You are done calling llmstudio on GCP!